動画内では下記の文とは多少違う方法での修理です。
チェーン修理の重要性 | The Importance of Chain Repair
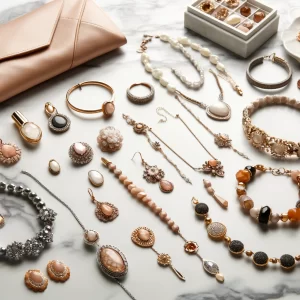
アクセサリーは身に着けるだけでコーディネートのアクセントになりますが、使っているうちにチェーンが切れてしまうこともありますよね。そんなときは、自分で直すこともできますが、工房に依頼することもおすすめです。
Jewelry adds a special touch to any outfit, but chains can sometimes break with use. When this happens, you can repair it yourself or consider taking it to a workshop for professional help.
アクセサリーのチェーン修理の方法 | How to Repair Jewelry Chains
このブログでは動画で、アクセサリーのチェーン修理の方法や注意点を紹介します。自分で直す場合は、どんなパーツや工具が必要なのか、どんな手順で行うのかを詳しく解説します。
In this blog, we’ll show you how to repair jewelry chains through a video tutorial, highlighting important tips and considerations. We’ll explain what parts and tools you need and the detailed steps to follow if you choose to repair it yourself.
修理に必要なパーツと工具 | Necessary Parts and Tools for Repair
- パーツ | Parts
- ジャンプリング (Jump Rings)
- クラスプ (Clasps)
- 工具 | Tools
- ペンチ (Pliers)
- ルーペ (Magnifying Glass)
- ニッパー (Wire Cutters)
チェーン修理の手順 | Steps for Chain Repair
- 切れた部分の確認 | Inspect the Broken Area
- まず、チェーンの切れた部分を確認し、修理に必要なパーツを特定します。
- First, inspect the broken area of the chain and identify the necessary parts for repair.
- ジャンプリングの取り付け | Attach the Jump Ring
- ジャンプリングをペンチで開き、切れたチェーンの端に取り付けます。
- Use pliers to open the jump ring and attach it to the end of the broken chain.
- クラスプの取り付け | Attach the Clasp
- クラスプをジャンプリングに取り付け、ペンチでしっかりと閉じます。
- Attach the clasp to the jump ring and securely close it with the pliers.
- 仕上げ | Finishing
- すべてのパーツがしっかりと取り付けられていることを確認し、修理完了です。
- Ensure all parts are securely attached and the repair is complete.
まとめ | Conclusion
アクセサリーのチェーン修理に関心がある方はぜひご覧ください!自分で直す場合は、どんなパーツや工具が必要なのか、どんな手順で行うのかを詳しく解説しています。
If you’re interested in jewelry chain repair, be sure to watch the video! We’ll explain in detail the parts and tools needed and the steps to take when repairing it yourself.